A birthday card for a young princess. It measures 6x6 inches when flat. The front and the back are folded in halves. The cute stamp is Sassy Princess Marci by La-La Land. :-)
Tuesday, October 07, 2014
Monday, October 06, 2014
Gone Fishing!
Been home sick for the last four days. Not very common for me, but I guess it has to happen every now and then as I'm in contact with so many people every day through work. I've mostly stayed in the sofa - listening to the radio and drinking blackcurrant toddy. I've also colored in some stamp motifs, and tonight I even made a card! The stamp is Gone Fishing Luka by La-La Land. :-) (the sun and the balloons are just drawn by hand) The thread is waxed linnen thread. It's really easy to shape in the right positions, and secure with a small drop of glue.
Thanks for visiting!
Wednesday, October 01, 2014
Christmas coming up...
October already! I should have started two months ago... These last few months until Christmas will be flying by. They always do. I made this year's first Christmas card today. It's hard to find my mojo, probably because I so rarely make cards these days. But I just got a large order of stuff in the mail, and I really hope I get to use it all in the weeks to come.
On this card I've used some of my all time favorite papers by Cosmo Cricket (they are old, but gorgeous!). The stamp is by Wild Rose Studio, and it's adorable! It's inked with brown ink, and colored with Promarkers and colored pencils.
Thanks for visiting! :-)
On this card I've used some of my all time favorite papers by Cosmo Cricket (they are old, but gorgeous!). The stamp is by Wild Rose Studio, and it's adorable! It's inked with brown ink, and colored with Promarkers and colored pencils.
Thanks for visiting! :-)
Saturday, September 06, 2014
The Secret Garden
Two updates in one day! Well, aren't I the wild one? Another card with a stamp by Sarah Kay and Stampavie. Papers by Graphic45. Coloring with Copics, Promarkers and Inktense pencils.
This made me think about "The Secret Garden" by Frances Hodgson Burnett. I loved that book as a kid. :-)
Hooray, Hurrah, Hurra...
Well, hooray! Or hurra in my language. Love this cute mouse by... oh, lawd... It's been so long, and my brain just stopped working. Messing up my space looking for the package. I'll be back with the name when my head is back on my shoulders. Sorry. Very simple cards... Always trying to use some of my scraps.
(ETA: Whiff of joy! Ahhh... How could I forget?)
A happy weekend to you all! :-)
Coloring with Promarkers, Inktense and Colorsoft pencils.
(ETA: Whiff of joy! Ahhh... How could I forget?)
A happy weekend to you all! :-)
Coloring with Promarkers, Inktense and Colorsoft pencils.
Thursday, September 04, 2014
Always Explore
I'm re-exploring my old stuff again. Old stamps by Stampavie and Sarah Kay, and very old papers by Daisy D's and Junkitz.
Coloring done with a mix of Promarkers, Copics and Inktense pencils.
Clean and Simple... Thanks for visiting :-)
Coloring done with a mix of Promarkers, Copics and Inktense pencils.
Clean and Simple... Thanks for visiting :-)
Thursday, May 22, 2014
Accordion card.
Accordion Card... They are not too difficult, but it requires very accurate folding, cutting and gluing for a good result. The accordion should fold down completely flat when pressed together.
Tim Holtz alterations tag
Butterflies and trees are made with dies by Memory Box.
Stamp by Whiff of Joy.
Coloring done with Promarkers and Derwent Coloursoft pencils.
The sentiment is stamped on a tag, and can easily be pulled out from the top of the card. Flip the tag, and there's a hidden pocket for money.
Card closes with magnets.
Friday, November 08, 2013
Watch out!
Today I made a card using some of my own stamps from back when I made PapilioStamps. I've rarely been using them, as I guess I just feel done with the motifs after drawing them. But it's been so long, so it did feel better now. Quite simple card without any patterned paper or other stuff. Just stamps, markers and pencils.
Thanks for visiting!
Thursday, November 07, 2013
More Christmas (soft pencils on kraft cardstock)
I've had a few of these Paintbox Poppets stamps laying around for years. I believe they have later been released as clearstamps with less shadows and details. Mine are mounted rubberstamps, and I must admit: Gorgeous as they are, they are just too hard to color in with good results for me. Until... I had this great idea to stamp them on to kraft cardstock, and color with some high quality soft pencils by Derwent. I love the result! The colors really pop when added to this background.
I had so much fun, I decided to do the same with these mice by Penny Black. I love the softer feel of the cards when using kraft instead of white, and the pencils are also much softer looking than markers. But then - I always add pencils on top of markers to add structure.
Thanks for visiting :-)
Tuesday, November 05, 2013
Christmas again?
Oh... I'm making christmas cards these days! Still a terrible blogger, though... I will get get my cards photographed one of these days. I promise! Let's start with today's very, very clean and simple cards. I made six of these, but they all look the same. Sentiment by Kort&Godt, inked up with Memento on Kraft cardstock by Bazzill. Dies by Memory Box and Spellbinders, and some christmassy ribbon :-)
Thanks for stopping by!
Thursday, May 23, 2013
You take the cake!
Du tar kaka! - You take the cake! (never really knew that this saying existed in english too!) I'm having a blast these days, coloring in Mo Manning's awesome digital stamps. I'm in love with her stamps, and I just looove the expression on this cute cake-thief's face! Made a couple of these really simple cards lately... Thanks for visiting! :-)
Wednesday, May 22, 2013
Working with a list of "ingredients"
Today was great! I finally installed Skype, and we had a mini-crop using the www and web-cameras. Such a great idea! I rarely attend crops, as I never know what to bring. I really need to have all my stash nearby when scrapping. We challenged each other to use different stuff, and came up with a list of "ingredients" for our tag. It had to contain: Paint, Dylusions spray, Lace, Aluminium foil, Recycled cardboard/packaging, Paper flower, Twine, a Twig, Sticker with a Word or Letters, Book page, Glass or Clear Plastic and a Bottle cap.
When I was done with this tag, I wanted to make another one. A simpler one this time, just to test a new ink pad (Mix'd Media Inx by Colorbox and Donna Salazar) my friend Linda gave me. Great ink!
So here's my tag:
When I was done with this tag, I wanted to make another one. A simpler one this time, just to test a new ink pad (Mix'd Media Inx by Colorbox and Donna Salazar) my friend Linda gave me. Great ink!
Thursday, May 09, 2013
100% Man
Forgive me readers, for I have been lazy. It's been over a year since my last post. Most cards I make are too boring to bother posting. But here's finally a card! Mo Mannings' cool stamps are so awesome, this guy didn't really need a lot of additional stuff. Only papers by Basic Grey and some sentiments (by Northstar Stamps and Stempelblad). Thanks for visiting! :-)
Sunday, March 18, 2012
Mini album using Graphic 45 papers
My latest project is a mini album. I made a video of it :-)
Thanks for visiting :)
Sunday, February 12, 2012
Ooops! I laid an egg! A really hard boiled one...
Ok, so I'm having a ball here! Or an egg, really... This was a superduper fun project, and I will be making more of this stuff!
This is something anyone can do. You don't really need a room full of equipment and stuff. A roll of aluminum tape from a hardware store, a pair of scissors, and an object to alter (like a metal or cardboard easter egg, a frame, a box, your hubby's old boot, or whatever...) and something with a little texture to stamp textures on the faux metal plates. I'm sure you have something in your stash, in your kitchen drawers, or in the garage.
I used some old eyelet setters and timbles to stamp texture into the foil tape. Worked great.
I watched RachO113's video tutorial on youTube, and got so inspired. This is super easy, and super fun. Check it out! For more great ideas on how to use your roll of cheap fun, check out Linda's video here (I will be doing this next)
And imagine your hubby's happy face when you propose a visit to the DIY/hardware store! ;-)
Tuesday, February 07, 2012
Polymer Book Cover
In search of my mojo, I've realized that I need to try new techniques and new styles. Yesterday afternoon I watched Linda's video-tutorials on polymer clay over at her blog liveartnow.blogspot.com. Luckily, I had a large box of polymer clay stashed away in my closet (surprise!), which enabled me to get to work straight away (some of you may know that I've been playing with clay earlier...).
Linda made this totally amazing steampunk mini album - you should really go check it out! I was lucky to get to see it in RL, and it absolutely blew me away! Polymer clay has such endless possibilities, and it's so much fun to work with :)) Please check out her tutorials and her work, she has a channel on youTube, and you'll find the links on her blog.
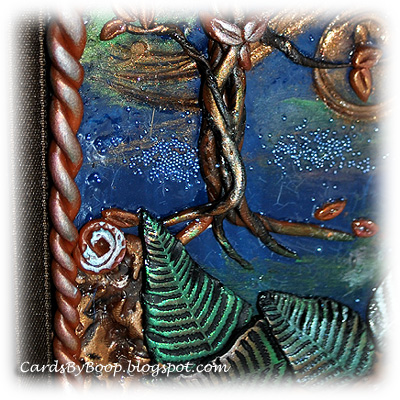
I wasn't really sure what to create - I wanted to do something quick at first, not some large project that would probably end up half done. I made a few accents and then I made this book cover for a cheap notebook I had on my desk. It was done in a few hours, and I love how it turned out.
My next project should be a larger one. I do have a lot of clay to get rid of...
Thanks for visiting! :))
Linda made this totally amazing steampunk mini album - you should really go check it out! I was lucky to get to see it in RL, and it absolutely blew me away! Polymer clay has such endless possibilities, and it's so much fun to work with :)) Please check out her tutorials and her work, she has a channel on youTube, and you'll find the links on her blog.
I wasn't really sure what to create - I wanted to do something quick at first, not some large project that would probably end up half done. I made a few accents and then I made this book cover for a cheap notebook I had on my desk. It was done in a few hours, and I love how it turned out.
The polymer image was made as one large panel, and then glued on to the book cover when cured. It's best to glue it down while still warm. It may bend while cooling down on it's own, and it will break if you try to flatten a cold piece.
I pierced an old dragonfly brad into the clay. I still find these really pretty :)
I sprinkled some blue microbeads on the background, and pressed them gently into the clay, but they didn't really stick very well. But varnishing the piece with crackle accents when cured, did the trick.
My next project should be a larger one. I do have a lot of clay to get rid of...
Thanks for visiting! :))
Wednesday, January 04, 2012
Happy New Year!
Hi all!
Wow, not much creativity going on in this blog lately! Weird, I actually made quite a few cards this christmas, but they were all made for a fair, and I guess I just didn't take the time to snap photos and posting them online. But they were all pretty clean and simple... no wow-factor really.
I made these two cards today. Some of my oldest digital stamps for PapilioStamps - and I still love these images. Actually, these were the first stamps I drew, because I made these before I produced any rubberstamps, and I never had the guts to send them to production. I just didn't know if anyone would like them. After years, I released them as digis instead...
Coloring was done using a mix of Copics, Promarkers and Derwent pencils. I resized the images to fit the small (8,5 x 13,5 cm) cards.
Sentiment by: Stempelblad
Swirl stamp by: Autumn Leaves
Thanks for visiting :))
Monday, September 12, 2011
Sunday, September 11, 2011
Thursday, September 08, 2011
Sing for me...
I haven't given up stamping - but a girl's gotta do what a girl's gotta do, and I really feel like doodling a lot these days. That's why I've taken up hand drawn cards lately. Don't need much equipment, and I can doodle whenever/wherever it pleases me. Suits me perfectly! :)
This one's called "Sing for Me"
Subscribe to:
Posts (Atom)